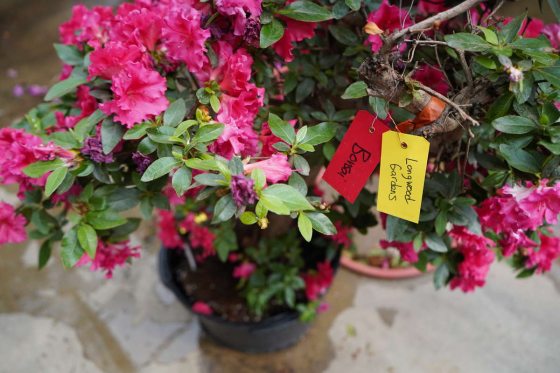
The art of bonsai is rooted in patience and harmony … a practice that entails contemplation and lots of decision-making along the way. Those decisions must be made from both a horticultural standpoint and an aesthetic standpoint in order to achieve the true goal of bonsai: nurturing and training a tree in a container to appear as it would in nature. Join me as I train a striking red-flowered azalea standard into a bonsai. This azalea came to Longwood along with five other azalea standards with the intention of being trained into bonsai. Despite its many challenges, this azalea (with some patience) will blossom as a bonsai.
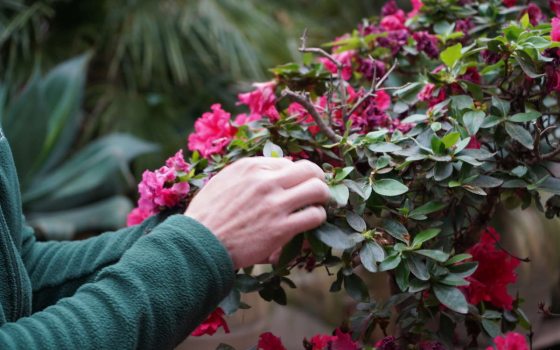
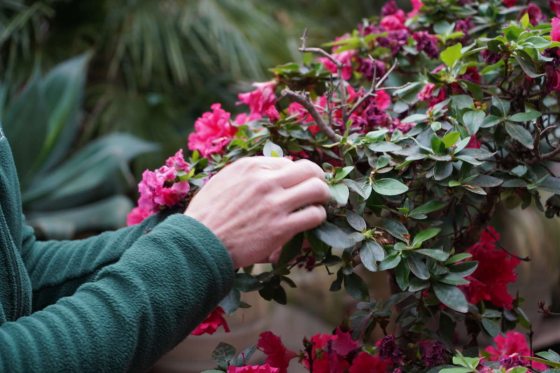
A close look at our evergreen azalea standard, ready for its bonsai transformation. Photo by Carol Gross.
Translated from Japanese into “planted in a container,” bonsai is based on the relationship between a tree and its complementary container. Bonsai can be grown from seed or can be created from evergreen or deciduous shrubs or trees … such as our azalea. Bonsai are classified by size, with 12 subcategories among the three general categories of miniature, medium, and large, measured from the top of the container to the apex (or top) of the tree. The smallest classification, kenshitsubo, are typically between 1 to 3 inches in height, while the largest classification, imperial, encompasses trees that grow between 60 to 80 inches tall.

Six azalea trees of varying flower size, shape, and height will be trained into bonsai over the next several years. Photo by Carol Gross.
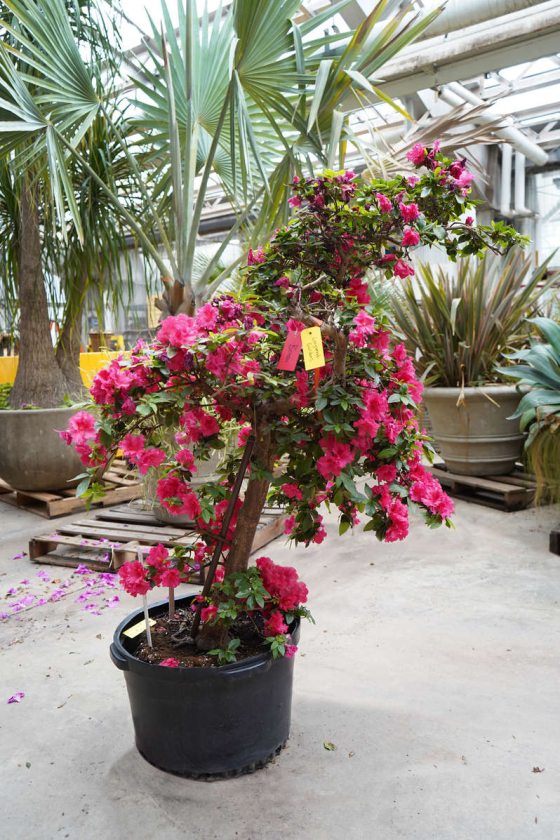
This particular azalea measures 44 inches from the top of the container to its apex, making it the smallest in the large bonsai classification called omono, which includes trees from 30 to 48 inches tall. Each size has its own challenges (for instance, the smallest have to be pruned constantly), but the true excitement of bonsai, at least to me, is creating a sense of harmony with nature.
Many bonsai are trained to evoke the movement of blowing in the breeze, turning to the sun, or living in the elements of nature. To do so, we must understand each tree’s personality and characteristics, as well as accentuate those traits rather than work against them. This tree certainly has a lot of personality … it features a striking red flower and a traditional Asian structure similar to that of traditional bonsai, including elegant movement in the trunk and alternating branches with various height pads.
The tree’s different branch elevations remind me of a Japanese landscape where each pad represents a hill. Photo by Carol Gross.
This particular azalea presents many challenges in becoming a bonsai. It was originally potted at the wrong angle, has extra branches and branches that need to be moved, and has a considerable amount of deadwood to clean. The tree is tall and slender with branch movement that resembles a conifer tree, even though an azalea is deciduous. Its branches point at a downward angle and feature jagged movement, particularly its lower right branch; this type of growth is typically seen in conifer trees. Along the way, we will work to train the tree into having thick to thin branches alternating from left, right, and back up the entire tree in a uniform manner. Depending on how the branch pads develop as we train the bonsai, it will either become a slant or informal upright bonsai.
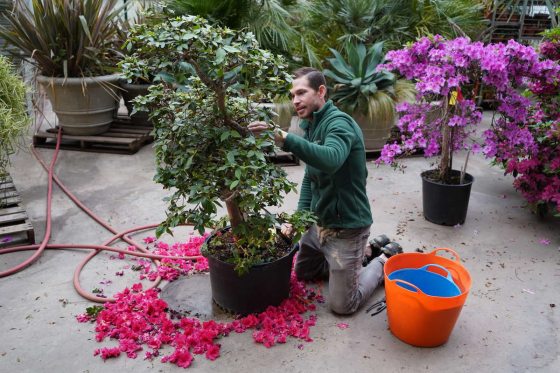
Before we get there, however, let’s take a few steps back. We started training this tree in early April. Our first step was to remove its flowers, which allows us to get a better look at the tree’s form and gives the tree energy to focus on growth rather than using that energy to lose its flowers on its own. Removing the flowers doesn’t harm the tree.
We manually remove the flower to let the tree conserve its energy for future growth, rather than allow the tree to use that energy on naturally losing its flowers. Photo by Carol Gross.
Once the flowers are removed, I can get a better look at the bones of the tree and start anticipating which branches will stay and which will go. Photo by Carol Gross.
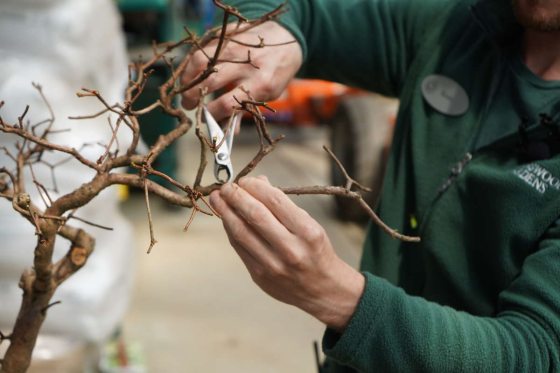
After removing the flowers, our next step was removing dead branches and material from the tree. We use a concave pruner so the cut left behind will heal flat. This is one of my favorite steps, as opening up the tree enables me to get a feel for the tree’s design potential. This tree offers a good relationship of big, then medium, then small branches going from the bottom to the top of the tree, which I’m excited to work with.

With each cut of foliage, I'm able to better envision the eventual movement into which the tree will be trained. Photo by Carol Gross.
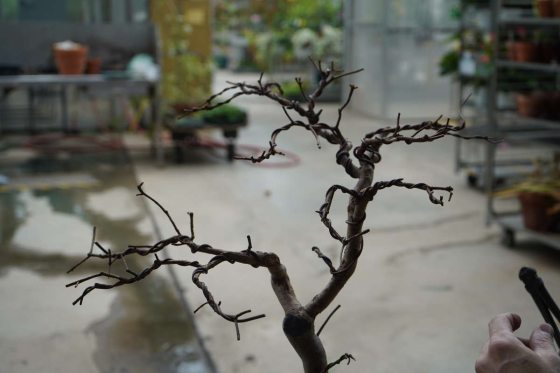
After giving the tree some time to rest, my next step was removing all of the tree’s foliage, which allows me to get an even better look at its bones to make better decisions on which branches should be removed, and to allow for more efficient wiring.
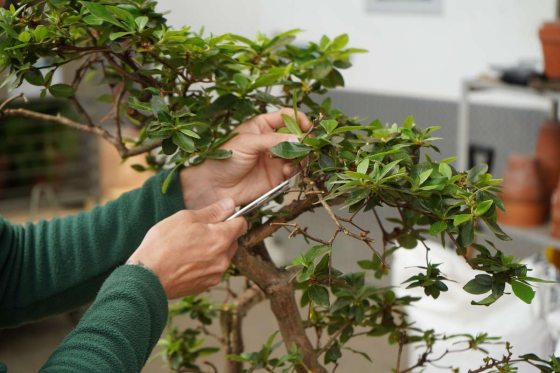
Using concave cutters, I cut back just beyond where the fresh green growth started. Photo by Carol Gross.
After the foliage is removed, we focus on removing appropriate branches to acheive our desired aesthetic and enable optimal growth. Photo by Carol Gross.
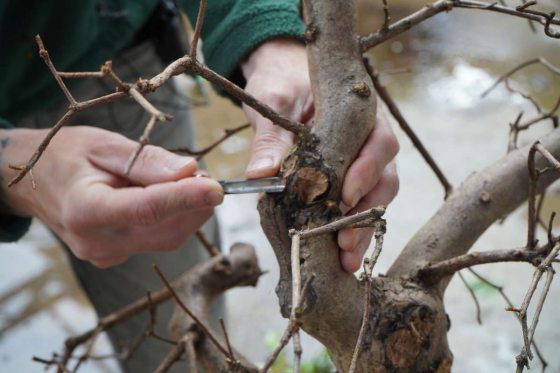
A lot of factors, based both on aesthetics and horticulture, go into deciding which branches to remove. On the aesthetic side, I try to remove any branches that grow at a horizontal line, as those branches can look very unnatural to the eye. On the horticultural side, in bonsai, you want to avoid having three or more branches meet at one joint … this can cause a rapid thickening or swelling at that junction, which can cause reverse taper, a condition in which the tree’s trunk goes from thin to thick working from the base of the tree upward. That would go against the thick to thin progression we are trying to achieve with the bonsai; thick to thin adds to the aged characteristics of a tree and is more visually appealing thanks to the smooth transition from the trunk to the finest branch tips.
I’ve chosen to remove the knobs from this tree to allow for a smooth silhouette complementing its slender shape. Removing the knobs will also allow the wire to sit as flush as possible … once we get to that step. Photo by Carol Gross.
When I have to decide which branches to remove at such junctions, I base my decisions based on existing branch placement in an effort to create optimal spacing. Proper spacing between branches allows light and air to go to the areas that need it most from a horticultural standpoint, and help it look its best from an aesthetic standpoint. This azalea in particular has large leaves and flowers, so proper spacing is really important.
During the pruning process, I remove areas growing downward and whittle away deadwood and knobs in order to allow for a similar silhoutte throughout the tree. Photo by Carol Gross.
I also apply cut paste to the tree to help any resulting marks heal faster; I make those cuts with a razor knife, rather than a serrated knife, to allow for a cleaner, faster healing process. In contrast to most tree species, the lower branches of an azalea grow stronger than the apex, which enables us to prune the azalea more heavily toward the bottom.
A close view of the tree at this step shows a few sections treated with cut paste. We’ll remove the cut paste once the past application starts to crack, which will allow for the tree to callus.
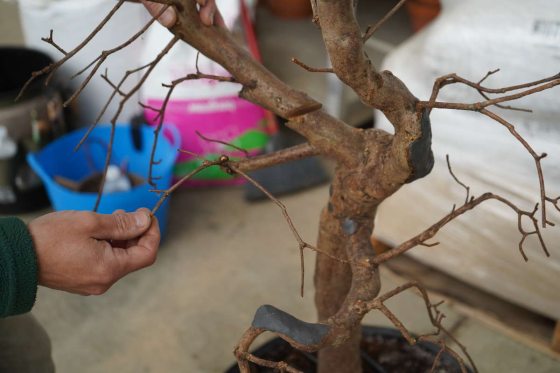
Throughout each step of the process, I consider what part of the tree will serve as the front, or the side that will ultimately face the viewer. The front should be more open and lean toward the viewer, as the lean gives it more energy. The back of the tree should be fuller than the front and thus create a sense of depth and backdrop. There are a few challenges when it comes to determining the front of this particular tree. It features a branch growing outward in front of the trunk, which could be displeasing to the eye, as we ultimately want the eye to move up along the tree when viewed.

The front of the tree is starting to become more apparent, but I’ll need to make sure I’m leaving enough growth at the back of the tree to achieve the aesthetic. Photo by Carol Gross.
I would like the first branch at the bottom of the tree to be at the right or left side, which would require the eventual removal of a branch or tilting the tree at an angle in the container. I’d really like to accentuate the curves of this tree in any way we can, since it’s a slender tree to begin with, to give it more of a gesture. I also keep in mind where the center of the tree falls, as that part of the tree will typically be right at eye level once the tree is on display.
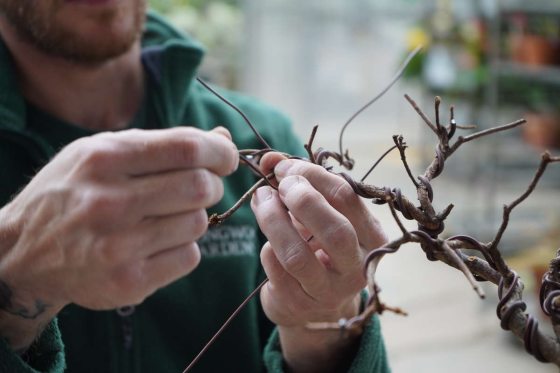
Our next step is a very visual one and a very important one: wiring. Wiring enables me to define the tree’s features and bring out its characteristics.

As shown in this picture, I’m wiring the lowest branch of the tree to evoke intended movement. This branch is one of the most challenging parts of the tree, but one that could yield a large aesthetic reward. Photo by Carol Gross.
I wire the bottom branches first and then work up. For this tree, I’m wiring with the goal of mimicking unseen forces on the tree to give it movement toward one side. I’m using aluminum wiring for this tree, which is the material typically used for deciduous trees. I choose wire size related to the thickness of the branch, opting for wire that’s about one-third the thickness of the branch I’m working on. If the branch bends the wire, the wire is not thick enough. I wire at a 45-degree angle for even spacing and weight distribution and follow different wiring motions depending on the thickness of the wire.
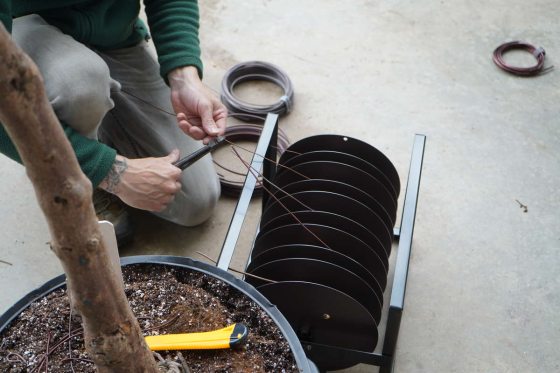
I choose from 10 different wire sizes, measuring from 0.5 mm to 7 mm, each increasing by 0.5 mm increments. Photo by Carol Gross.
There are a number of subtle nuances to wire application and subsequent branch bending. It’s an extremely sensory experience as I have to rely on touch, sound, and sight to make sure I’m not bending a branch too far. While bending, I visually assess a branch for brittle areas and junctions, and I listen for any bit of sound, which indicates I’m going too far and may break the branch. Ultimately, I’m bending branches to create rhythms and allow for better branch spacing for the tree.
Wiring is a delicate and multi-sensory process. The slightest sound can indicate a branch break is about to occur. Photo by Carol Gross.
Now wired, the tree is left to grow. It will form new buds and add new dimensions to its character along the way. Photo by Carol Gross.
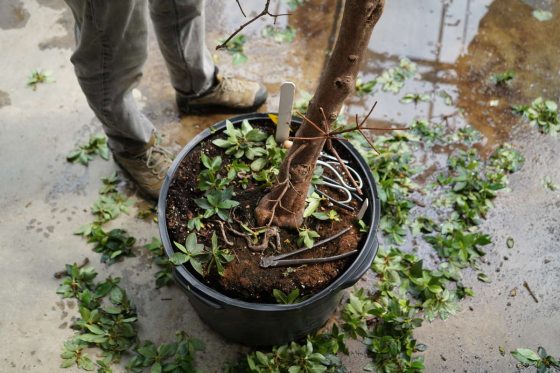
Once wiring is complete, the next step is to … wait. Now that I’ve cut the branches back hard and wired, I’ll let the tree grow for a couple months in hopes for new growth on the inside of the branch, closer to the trunk; this growth will allow us to form a smaller, more compact tree. Along the way, I’ll check the tree to see where the buds are forming and may periodically prune some of the new growth along the way in order to maintain a desired length in the overall silhouette. I’ll leave other branches to grow and then wire them so they thicken rapidly to become new branches.
I can’t wait to see where the tree goes and share its progress with you along the way.