For centuries, botanists, artists and hobbyists have enjoyed the art of pressing and drying plants. At Longwood Gardens we maintain a herbarium, an organized collection of preserved plant specimens. Our herbarium is comprised of almost 12,000 pressed and dried plant specimens. These specimens have mostly been collected in the gardens, greenhouses and natural lands of Longwood, as well as on plant exploration expeditions around the world. Some of the oldest specimens in our herbarium date back to the late 1940s and we are adding to the collection each day, in order to document the evolving history of living plants at Longwood Gardens. In addition to the scientific importance of pressing and drying plants, pressed plant material can also be beautiful and is easy to create at home with a few simple supplies!
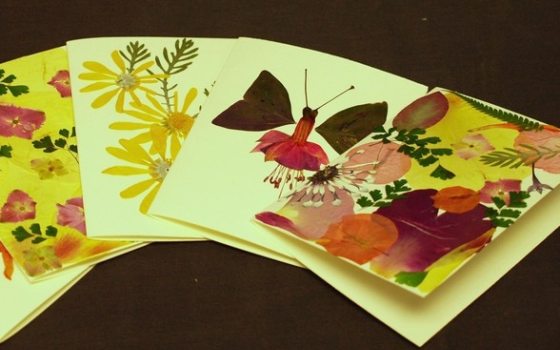
DIY Greeting Cards
Here, we will focus on pressing and drying plant material to make your own set of greeting cards. However, dried plant material can be used in a variety ways: bookmarks, framed wall art, jewelry, gift tags and candles. If you need some inspiration, simply search “pressed flower art” on the web and prepare to be amazed!
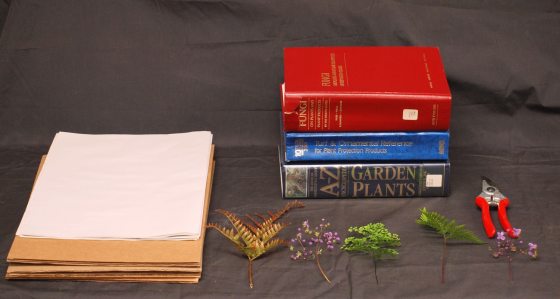
Supplies you will need for collecting and pressing plants:
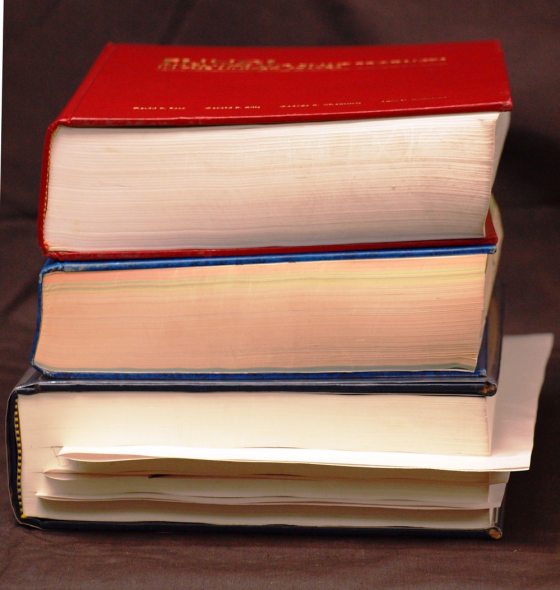
- A few large, heavy books (think encyclopedias, dictionaries, text books)
- Newspaper, tissue paper or unprinted newsprint
- Plant material
- Pruners or scissors for collecting plant material
- Box fan (optional)
Selecting the Right Plants:
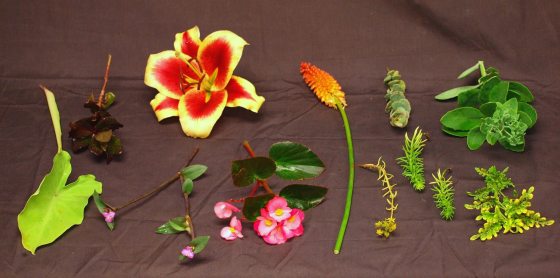
This will be the most important step in determining the outcome of your finished product. In general, color preservation is a factor of how quickly the plant dries once it has been pressed. Plants that dry quickly tend to hold their color through the drying process, while plants that have thick or succulent parts will dry more slowly and become brown or even moldy during the drying process.
Good plant material: perennial plants (as long as the leaves and flowers are not too thick), herbs, ferns and deciduous tree leaves.
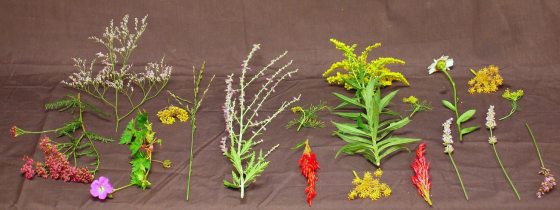
Plant material to avoid: plants with thick and succulent stems, bulbs, leaves or flowers.
Pressing your Plants:
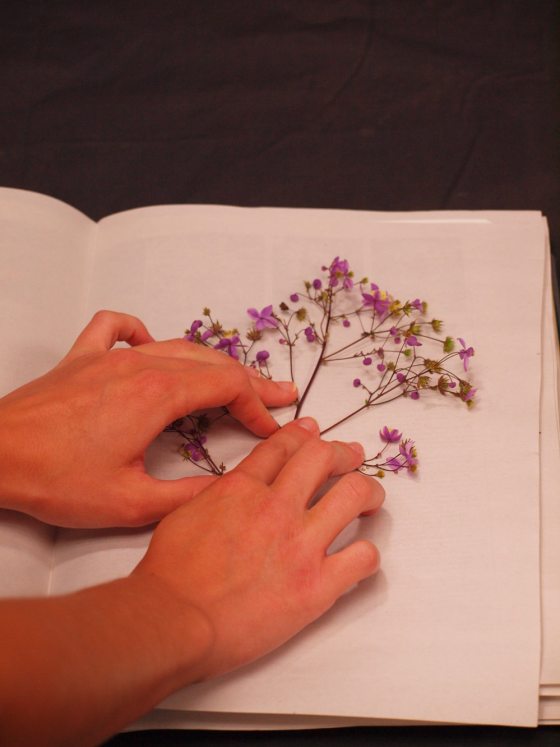
All you need here are a few large books and newsprint or tissue paper to protect the book and to wick moisture from the plants. When you arrange your plants, minimize overlapping of plant parts in in order to avoid creasing or folding in your finished product. Remember, how you arrange the plants here is the way they will stay when they are completely dried.
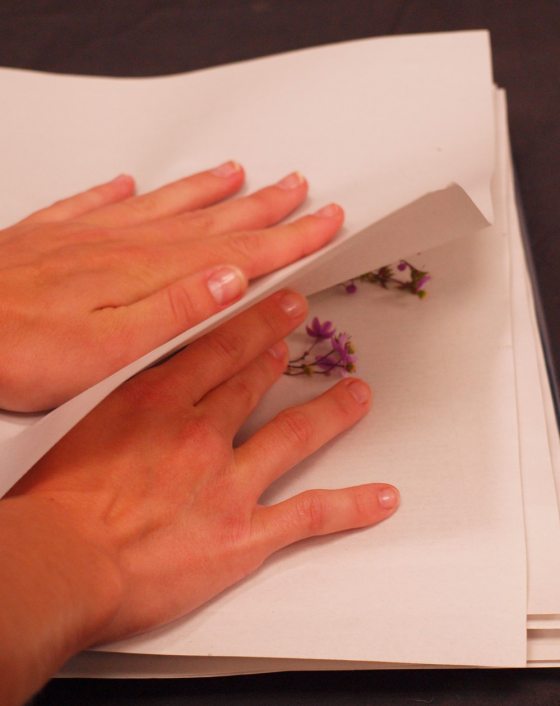
Press the plants in the books, between layers of newsprint, leaving about a quarter to a half inch of pages between each layer. Once all of your material has been pressed, stack some additional books on top and make sure you leave your press in a well-ventilated area to promote faster drying. If you like, you may even point a box fan at the stack of books to speed the drying process.
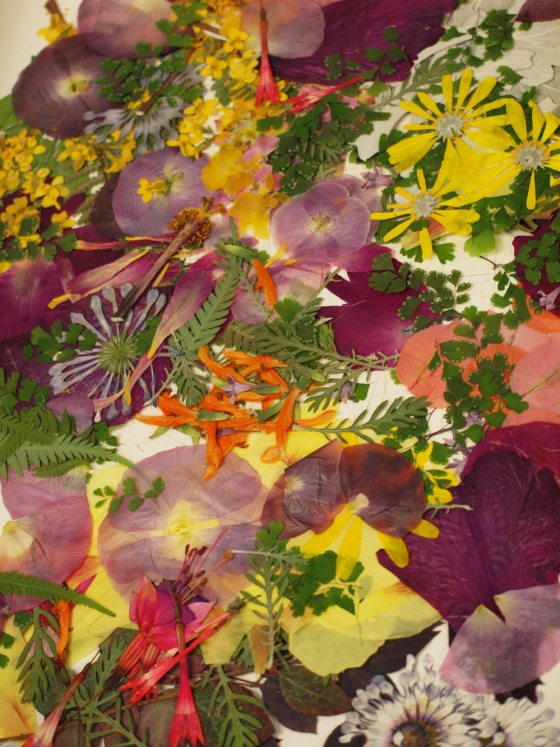
After a few days, be sure to check your press to see if you need to rearrange any stray petals or folded leaves and to see if the plants are drying properly. After a week or two, the plants will be completely dry (you can test this with your fingernail – if the plant is brittle, it is dry; if it feels like it will bend and fold, it is still wet). Once dry, you may remove your plants from the press and start getting creative!
Materials for Making Greeting Cards:
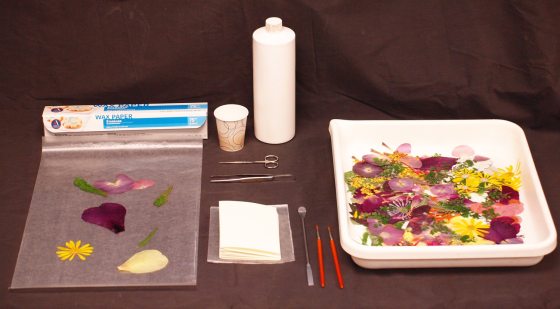
- Dried plant material
- Wax paper
- Paint brushes, scissors, tweezers
- Glue (we use acid free glue, however any clear-drying craft glue will do)
- Paper (again, we use acid-free paper but you may use watercolor paper or any paper that is thicker than standard printer paper)
Making your Greeting Cards:
This is where your creativity will shine; however, here are a few helpful tips to keep in mind:
- Arrange your plants on the paper before you glue them to get an idea for layout.
- Use wax paper to protect your working surface and to keep your plants from sticking to everything except your greeting card!
- Use glue sparingly, you won’t need as much as you think!
- Use tweezers to transfer glued plant material onto your paper.
Once all of your cards are finished, you may layer the cards with wax paper and let them dry overnight under a heavy bookShare your handmade greeting cards with friends and family and enjoy the process of creating pieces of artwork from you garden, that will long outlast the transient blooms of summer!

This Friday, July 26, 2013, at our Beyond the Garden Gates Night learn more from our herbarium experts! We will be demonstrating the process of recording plant observations and pressing and mounting herbarium specimens. Kids can learn about collecting seeds and plant specimens, and try pressing different types of plants to make their own bookmark. See you there!
Photos by Ellen Bortner and Kristin Shirk.