What happens when the delicate elegance of bonsai meets the brilliance of a faceted gemstone? Inspired by the graceful branching and informal upright style of a Japanese maple, our meticulously hand-carved and cast gem bonsai sculpture celebrates both tradition and transformation, with a surface that shimmers with gemstone-like facets. Much like a gem unearthed and refined to reveal its inner brilliance, this sculpture transforms raw materials into a form that feels both organic and precious. Follow along as I share the story of crafting this sculptural tree, from concept to completion, and the artistry behind its creation.
When it comes to the concept of the gem bonsai piece, the idea was straightforward yet bold: create a gemstone that takes the form of a bonsai, and do so on a dramatic, full-scale level for maximum impact. I drew inspiration from the way a raw mineral, once unearthed, reveals its true brilliance through careful shaping and refinement. In the same spirit, this sculpture transforms basic materials into something extraordinary, echoing the artistry and precision that elevate both gems and bonsai into objects of beauty.
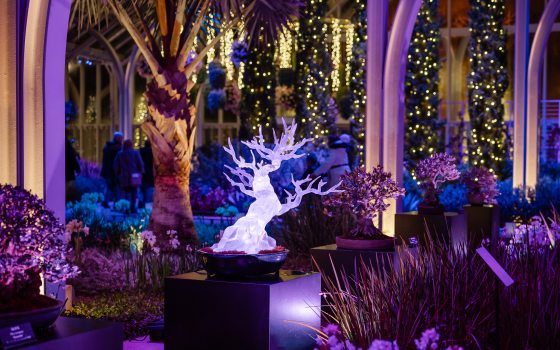
The gem bonsai, amid the beauty of our West Conservatory. Photo by Hank Davis.
While this was my first time creating a gem bonsai sculpture, I followed a technique that drew on my years of experience in mold-making and casting, from my days as a sculpture student at the Herron School of Art and Design at Indiana University, to teaching sculpture courses at Herron and the University of Delaware, to previous professional work in fiberglass fabrication.
I wanted the sculpture to feel alive, with a sense of movement flowing through its form. Gems have an inherently uplifting quality, so I drew inspiration from a deciduous tree, shaping the primary and secondary branches to reach upward and outward. To enhance that dynamic energy, I introduced subtle shifts in the trunk’s direction, creating a rhythm that suggests growth and transformation.
Work on the gem bonsai sculpture began this last September and unfolded through multiple stages: carving, mold-making, casting, and finishing. I began by stacking, laminating, and gluing wood blocks together to form the base, or main trunk line, then moved on to shaping its contours.
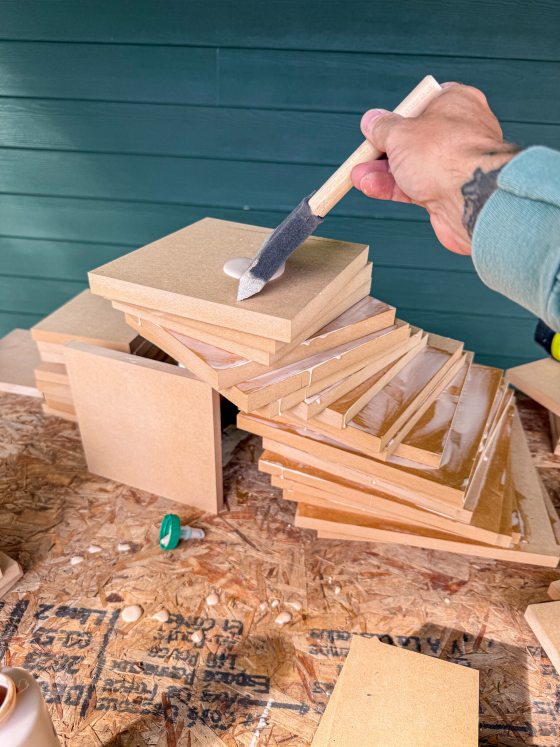
The first few cuts of wood are stacked and glued, creating a sense of movement from the very base of the trunk. Approximately 60 layers of wood were used. Photo by Kevin Bielicki.
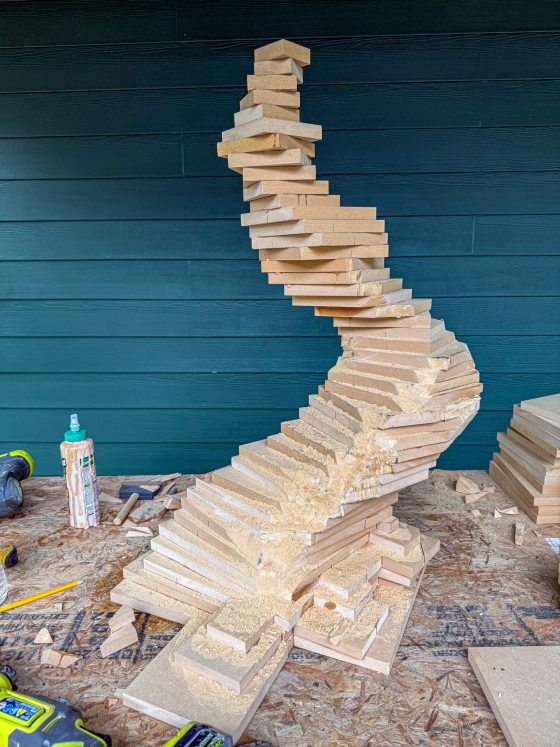
Rough cuts established the overall silhouette, followed by detailed facet work using an oscillating tool to carve gemstone-like planes. Hours of sanding refined each edge into crisp, clean lines before the trunk was primed.
Rough cuts begin. Photo by Kevin Bielicki.
Additional gestures of movement are added. Photo by Kevin Bielicki.

Using an oscillating tool, gemstone-like facets begin to take shape. The height of the bonsai was also reduced about one inch to give the form more taper, as often seen with live bonsai. Photo by Kevin Bielicki.
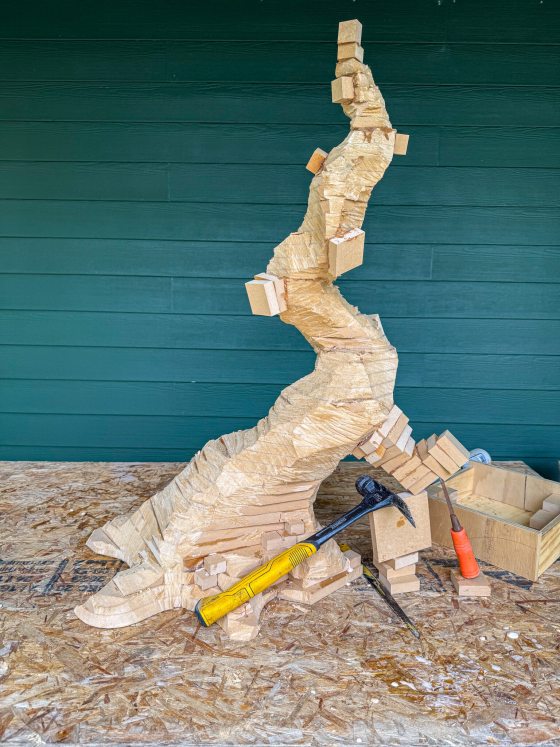
Branches are added (left) and then refined (right). Photos by Kevin Bielicki.

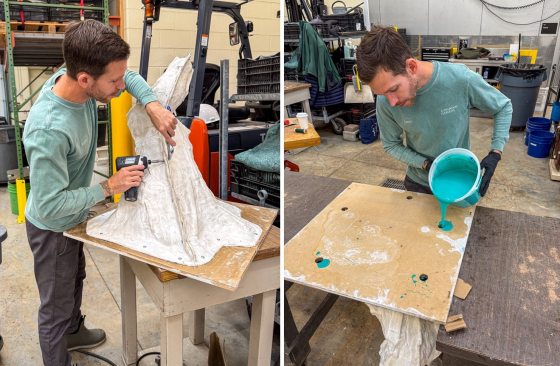
Once the form was made, I added black primer as a base and then applied drywall spackle to fill in imperfections. This also allowed me to sand out any lines that had developed during the wood-stacking process. Photo by Kevin Bielicki.
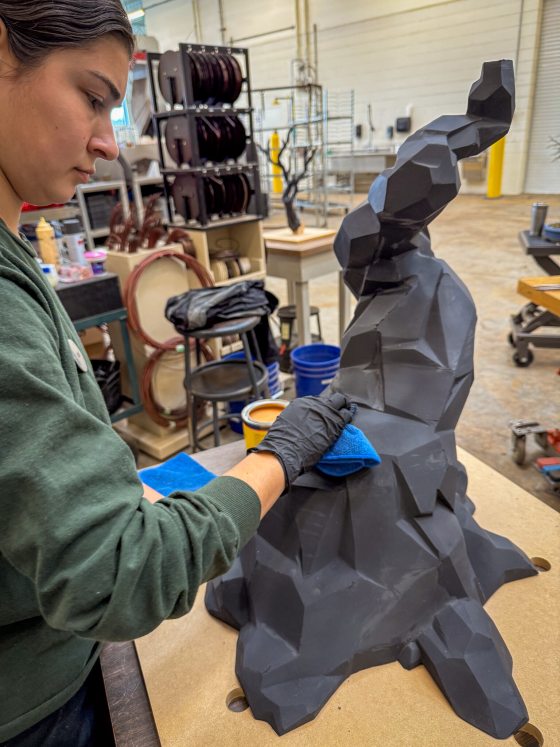
Conservatory Intern Natalie Valdez applies a coat of wax to the form in preparation for the mold-making process. Adding wax ensures the silicone and plaster molds do not stick to the form. Photo by Kevin Bielicki.
Bonsai Volunteer Mark Coccia makes a temporary inner mold with black foam for the plaster outer shell to be formed around. This part was temporary and later filled with silicone. Photo by Kevin Bielicki.
Mold-making came next and included creating both an outer shell and inner mold to capture every detail. Working with Bonsai Grower Matt Turner, we built a four-layer plaster outer shell and used foam to create a half-inch cavity between the wood and outer mold.
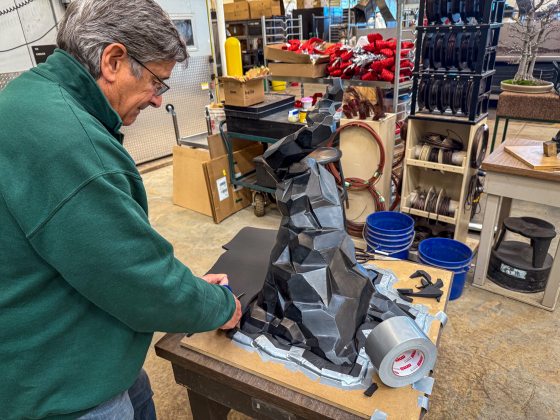
We needed to create a multi-piece mold for this piece. Here, we have added a parting line with aluminum flashing to keep the front half and back half of the plaster mold separate. Photo by Kevin Bielicki.
Bonsai Grower Matt Turner works on the plaster outer shell, moving from the base up and overlapping each piece to ensure a strong mold construction. Photo by Marleigh Flanagan.
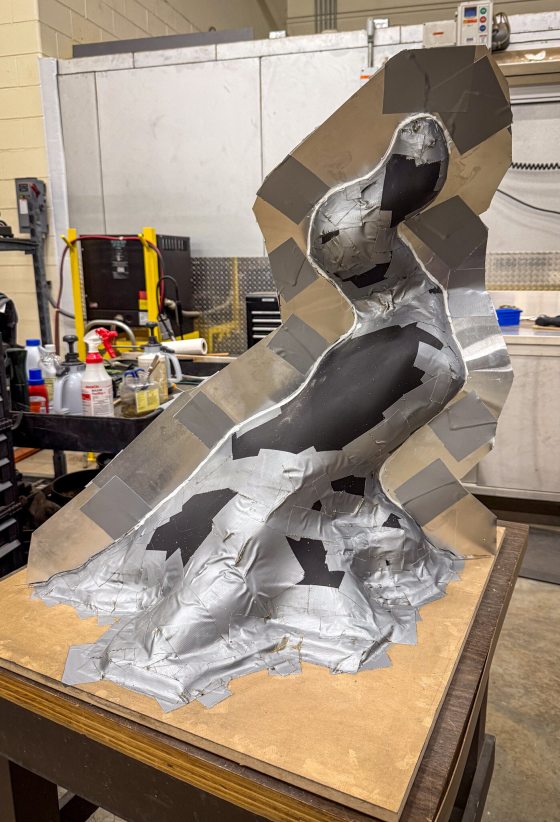
Shortly after removing the temporary inner mold, we reassembled the outer shell and added screws to make one outer shell (left). Then, we poured a silicone inner mold (right) before we removed the original wood part from the mold. Photos provided by Kevin Bielicki.
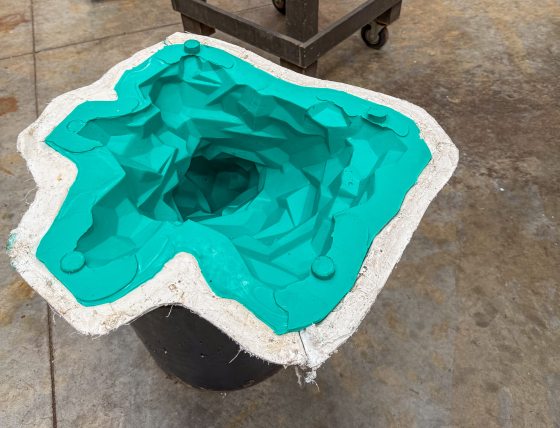
Here, a view of the hollow mold at the stage in which we poured in the epoxy resin in small increments. Photo by Kevin Bielicki.
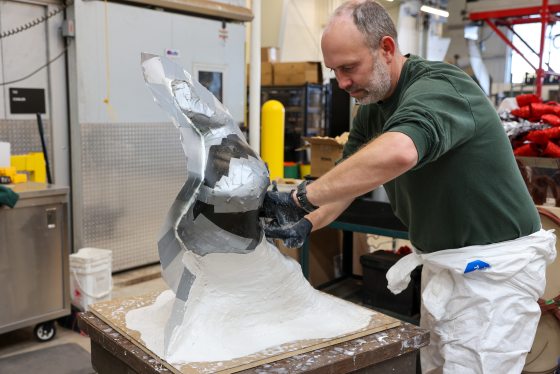
We made a sample piece of half the bonsai to test the process. Recognizing there were more bubbles in the test piece than we would have liked, we realized degassing the epoxy in a vacuum chamber would be required for a flawless final piece. Photo by Kevin Bielicki.
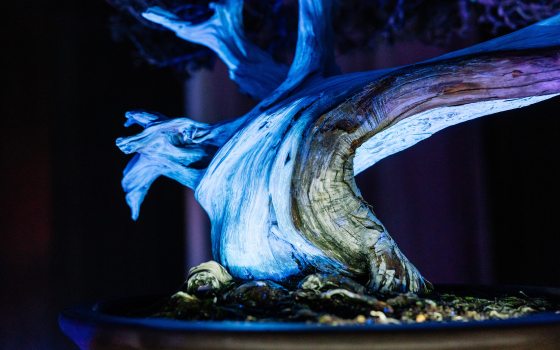
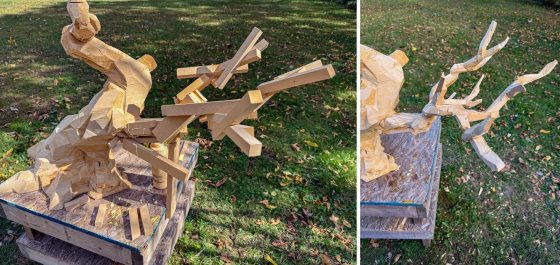
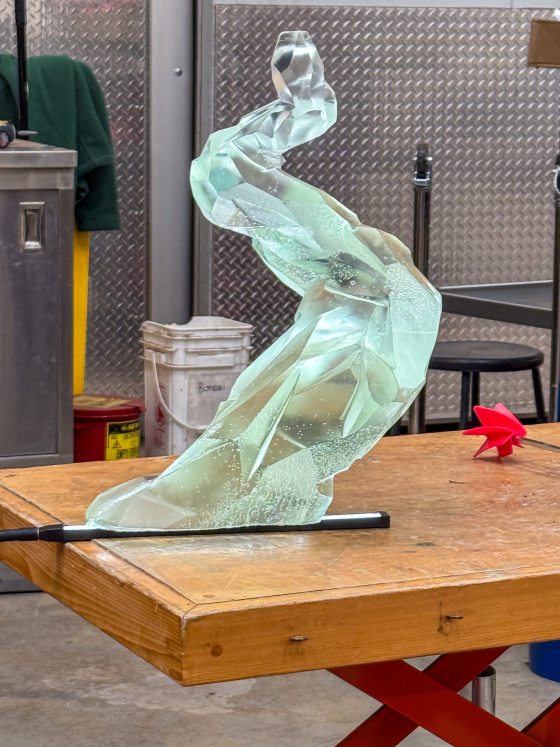
Each of the seven branches was cast separately in resin and joined to the base with clear epoxy. Longer branches were placed at the bottom, smaller ones at the top, echoing natural growth patterns.
After casting, we sanded and polished the resin surfaces to remove any imperfections. Some areas received a high polish and others a muted patina, creating a jewel-like effect that catches light without appearing overly transparent.
The first branch is glued in place and held in with clamps, allowing a full 24 hours to cure before gluing the next branch. Photo by Kevin Bielicki.
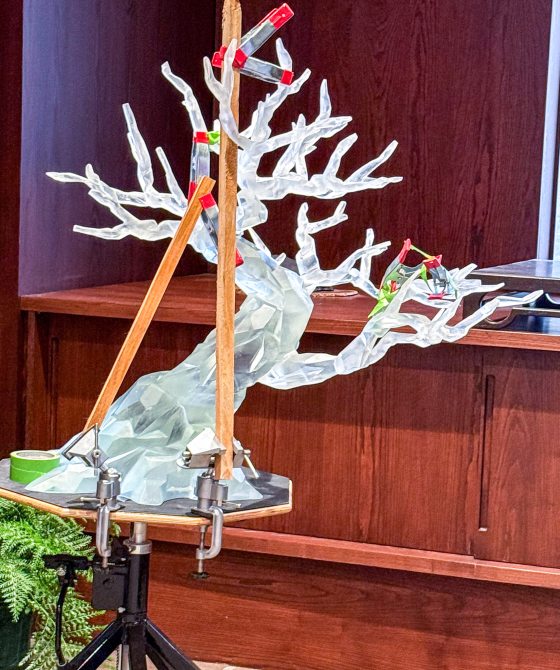
We added a few final branches to balance out the composition and create a beautiful shape and give each branch unique character. Photo by Kevin Bielicki.
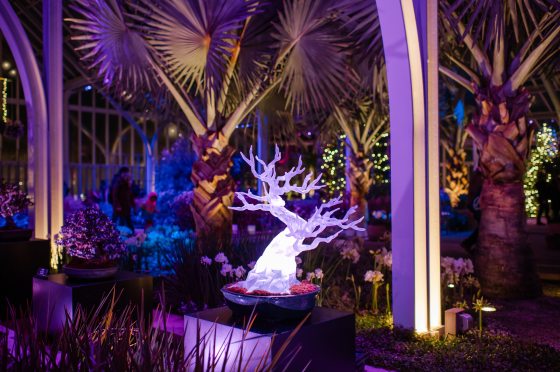
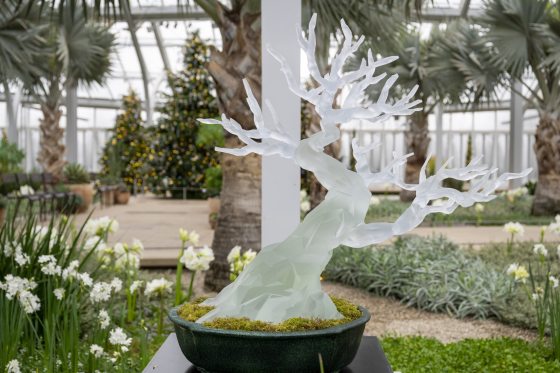
The finished gem bonsai, on view now in the West Conservatory. Photo by Laurie Carrozzino.
Much like living bonsai, the result is a conversation between nature and craft. The gem bonsai represents not only a creative challenge, but a celebration of imagination meeting technique. Just as a gem reveals its brilliance through careful shaping, this sculpture reflects the transformation of raw materials into something extraordinary. I hope it inspires you to experience the beauty of bonsai structure and the flicker of a beautifully faceted gem, all at once, in a completely new way.
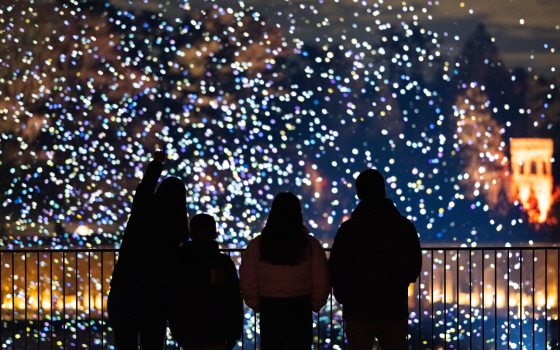
You can view the gem bonsai, joined by six living bonsai dressed with their own ornaments and gems, in our West Conservatory through A Longwood Christmas.