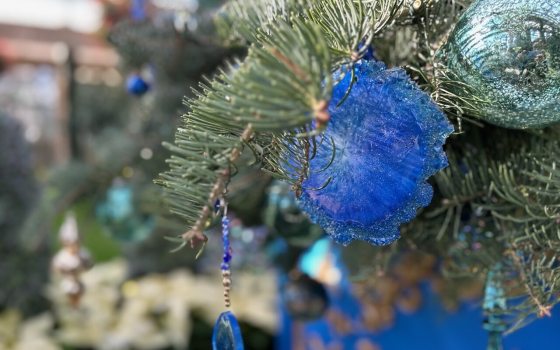
Every year, A Longwood Christmas showcases grand features made up of exquisite, handcrafted details created by our talented staff—and this season is no exception! This year’s display celebrates everything that glitters, from twinkling lights to shimmering gems. One of the many eye-catching features? Our Main Conservatory tree adorned with jewel-toned ornaments, including nearly 100 handmade geode-inspired ornaments crafted by our talented Visual Experience Manager Kaitlin Dodds. Not only are these geode ornaments gorgeous—they’re also a fun, festive DIY project perfectly suited for those willing to roll up their sleeves and follow their imagination. Here, learn how Dodds created these beauties, and how you can do so, too.
Step 1: Gather Your Materials
Start with your geode ornament supply list:
- Bubble free and clear epoxy resin kit: Choose a resin that is self-leveling and does not require a UV light to harden. This type of resin works best to make these ornaments because it will cure on its own usually within 24 hours and is less likely to yellow over time. Find a kit that includes a part A resin and a part B resin hardener which you will mix together with a 1:1 ratio.
- Alcohol-based dyes or other epoxy resin colorant in color(s) of your choice: Dodds prefers alcohol-based dyes as they can be purchased in a large array of colors. These ornaments can be any color you choose, but Dodds used blue, purple, and white for her creations.
- Translucent chameleon mica powder: This powder gives ornaments a shimmery effect. Dodds used a mix of blues and purples for her ornaments.
- 1–2 silicone molds: Using more than one mold can help you make several geodes at once. For an added challenge, you can make your own silicone mold using a silicone mold making kit and your own crystal or geode of your choice.
- Diamond dust (to give the ornaments even more shimmer)
- Crushed glass (to make the crystallized center of the geode)
- Mask
- Gloves
- Surface cover
- 3 plastic cups
- 3 popsicle sticks
- Drill with your desired drill bit size
- Ribbon
Makes: As many geodes as you’d like, dependent on how much material you have.
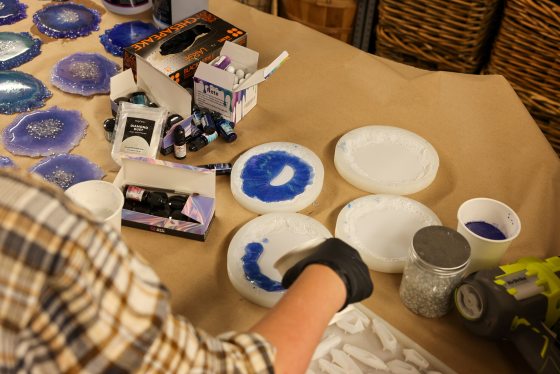
Step 2: Set Up Your Workspace
Make sure you are working in a well-ventilated space, as epoxy can produce fumes while it cures. Using a mask while you work with epoxy is recommended. Wear gloves and make sure to cover your surface with a paper or plastic covering as epoxy can be very sticky and difficult to remove if spilled on any surface. You may want to protect your clothing as well.
Step 3: Mix Your Resin
Pour your part A resin and part B resin hardener into a plastic cup using a 1:1 ratio—many epoxy resin kits come with a measuring cup and instructions on how much you need to pour. If you don’t get the proportions correct, your geodes will take a very long time to dry and will still have parts of them that are sticky. Using a popsicle stick, gently mix the resin and hardener together for about 3 minutes. If you do not mix it well enough—or if you mix it for under 3 minutes—your final geodes may have squishy parts to them.

The consistencies of the resin and hardener are slightly different, so if you see opaque streaks in your mixture, that is a good sign that you need to mix a little bit more. Mixing the resin too hard or for more than 3 minutes does not affect the solution, but it could add more bubbles into your final product. Photo by Marleigh Flanagan.
Repeat this step for your two remaining cups until you have three separate solutions ready to dye and add powder to.
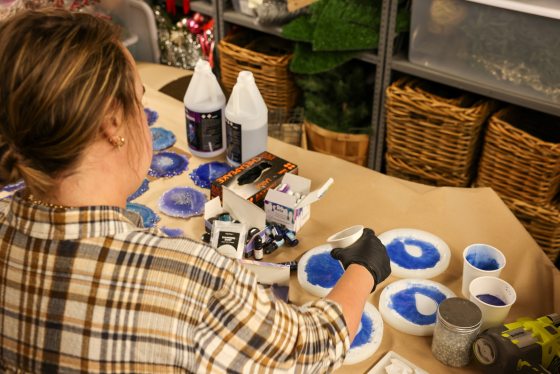
In one plastic cup, add several drops of blue alcohol dye and mix gently until the resin reaches a shade that you like. Do the same with your second cup, adding purple dye this time. Leave the third cup alone—this will be your white resin.
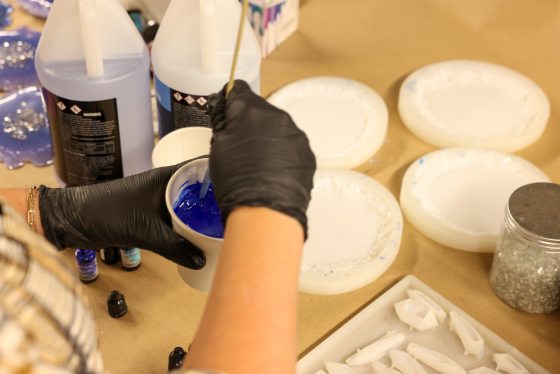
Experiment with how much pigment you add to each cup, as you can make as many ornaments as you’d like. The saturation of the colored resin depends on how much dye you add. Photo by Marleigh Flanagan.
Then, get creative with adding more pigment! There are no set measurements or rules when it comes to adding your chameleon powder and diamond dust. Dodds added blue powder into her blue resin, purple into her purple resin, and diamond dust to her plain/white resin. A little goes a long way! Be careful when adding the powder into the cups of resin, as the dust can fly up into the air. Wearing a mask may be helpful during this step.
Step 4: Pour Your Resin … and Decorate!
Now that you have your three cups of resin ready, set your silicone mold(s) down flat on your work surface and begin by pouring resin from one of your three cups.
As your pour slowly, make sure to leave room for your two remaining resin mixes. Photo by Marleigh Flanagan.
Experiment with starting with either blue or purple to create variation with your final results. You can add blue first, then white, then purple, then a white center, or any sequence you prefer. You can even omit one of your colors for different looks—the white resin is essential for creating the look of striations.
Pour each subsequent resin mixture starting in the center of the mold. At first, the resin mixtures will look separated, but, slowly, the ink in the resin will start to bleed and mix together to create interesting, unique lines and textures. With self-leveling resin, you do not need to shake the molds for the resin to flatten.
You don’t have to fill your silicone molds to the top with resin and some molds can be filled with more resin than others. This will produce different sizes of ornaments. Photo by Marleigh Flanagan.
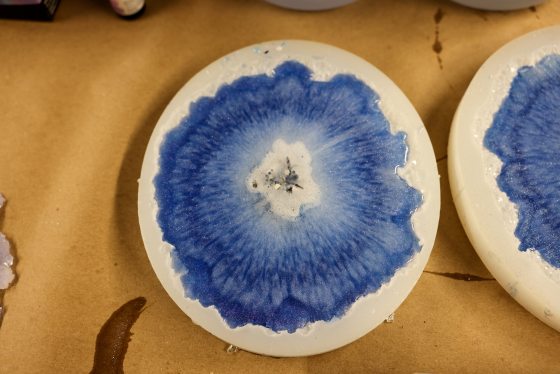
Once you have your silicone molds full of resin, sprinkle several pinches of crushed glass into the center of the molds to create that crystalized geode-center look. To keep the crushed glass contained in the geode ornament, top off the crushed glass with a thin layer of your white/plain resin.
In addition to or instead of crushed glass, you can also find silver shards or mica flakes and add those to the center of your geodes. You can also use glitter, but Dodds suggests using something with a bit more weight to it because glitter would float on the surface of the resin and make the finished product look a bit flat. The glitter detail may only be seen on one side of the geode. Crushed glass sinks to the center of the resin in the mold, making the finished product look a bit more dynamic.
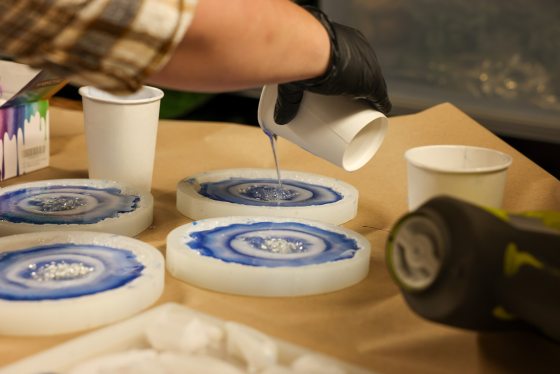
Pictured with crushed glass already added to the center, the resin will look separated at first. Here, Dodds tops off the crushed glass with a thin layer of white/plain resin to seal it in. Photo by Marleigh Flanagan.
Slowly, the ink begins to bleed and mix together. Photo by Marleigh Flanagan.
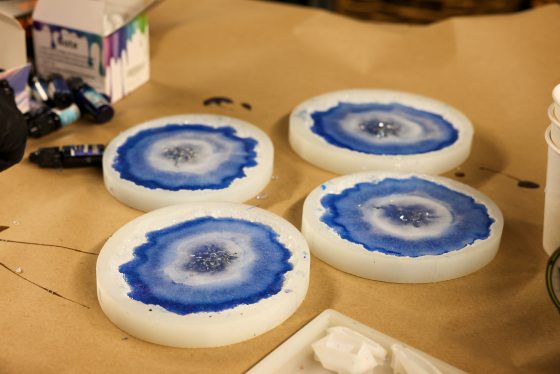
When the resin settles and mixes together, it will create interesting, unique lines and textures. Photo by Marleigh Flanagan.
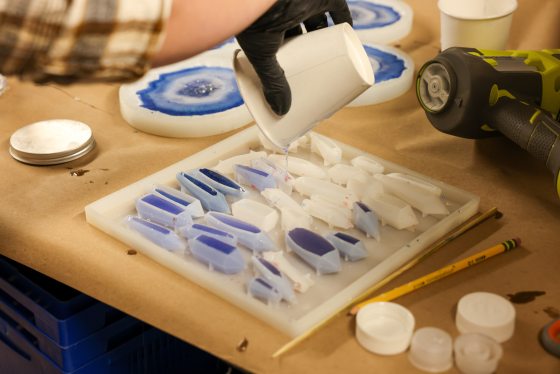
You can purchase several different types of silicone molds that are shaped like different geodes or crystals. Dodds used both a mold that creates a flat geode and a set of molds that creates crystal shapes. You can find these hand-made resin crystals hanging from the Center Walk tree as well! Photo by Marleigh Flanagan.
Step 5: Let the Resin Dry
Typically, your geodes will take about 24 hours to dry completely. One factor that could affect drying time is heat. Make sure you are doing this project in a room set to a neutral, comfortable temperate between 68 to 76 degrees Fahrenheit.
To check on the progress of your geodes, tap them gently with a gloved finger. If it is still slightly tacky anywhere, it needs more time. Once the resin is completely cured, it should be rock solid.
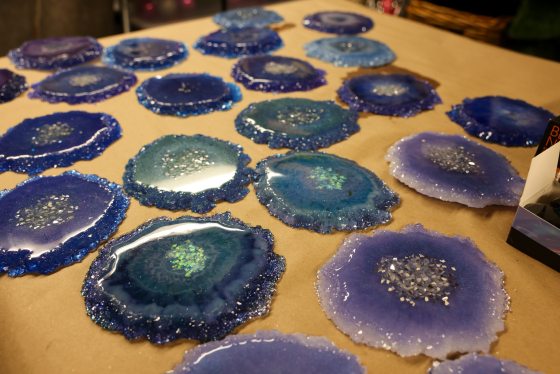
Be patient with the drying process! Here, you can see Dodds got creative with color combinations and amount of crushed glass added. Photo by Marleigh Flanagan.
Step 6: Make Your Geodes into Ornaments
Using your drill fitted with a drill bit, carefully drill a hole about an inch from the edge of your geode. During this step, you may want to wear a mask to protect yourself from any resin fumes or dust that may be released into the air when drilling.
Cut your ribbon into strips however long you want your ornaments to hang from your tree. Thread your ribbon through the holes you drilled into your ornaments and tie the ends of your ribbon into secure knots.
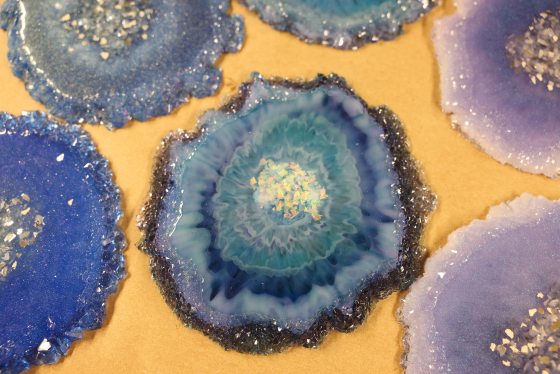
Here, Dodds’ completed ornaments shine. Photo by Marleigh Flanagan.
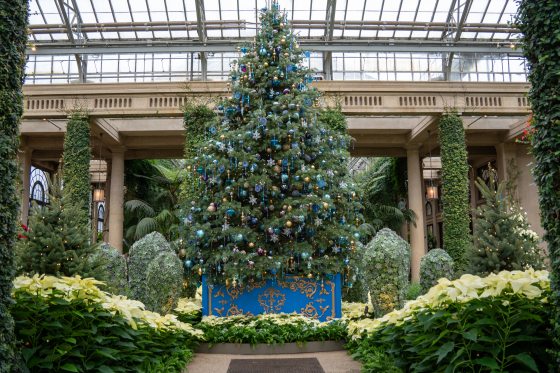
Completed ornaments on display in the Main Conservatory! Photo by Amy Simon Berg.
Bonus: these geodes can be used as coasters as well! Just skip the drill and ribbon steps.
Decorate your holiday tree or your mantel with these geode ornaments—or give them as creative, handmade gifts to loved ones! The best thing about this craft is that it can be recreated again and again based on how much material you have and can be enjoyed not just during the holiday season but anytime of year. Play around with different color combinations and make a whole collection of handmade geodes!
Dodds’ incredible handmade geode creations can be seen on display in A Longwood Christmas in the Main Conservatory. Every single one is slightly different, meticulously made, and a beautiful representation of the elements of handmade artistry and creative expression that makes A Longwood Christmas—and our talented staff!—so very special.