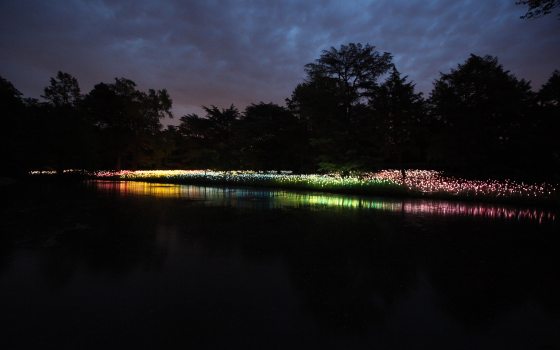
Field of Light at Longwood Gardens. Photo by Mark Pickthall.
Longwood Gardens can be a paradise for photographers, with acres of flowers in bloom, interesting architectural details around every corner, and stunning natural areas. This summer, with the opening of Light: Installations by Bruce Munro, our guests have yet another fascinating subject for their images. However, nighttime photography poses a unique set of challenges, and requires a much different approach than taking pictures during the day. Check out our 10 tips to avoid blurry, washed out images:
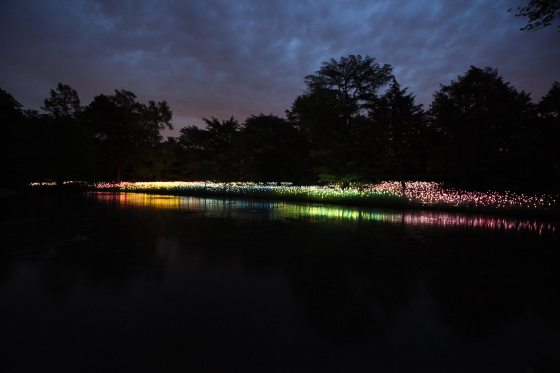
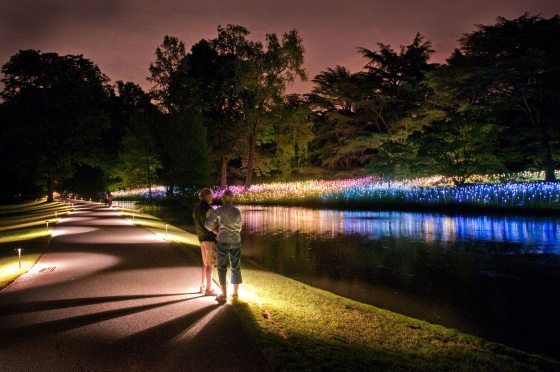
1. Arrive Before Dusk As the Gardens transition from day to night, you will be able to capture images that not only show off the Light installations, but also show the silhouettes of trees, statues, and other Garden features—not to mention the beautiful sky during sunset.
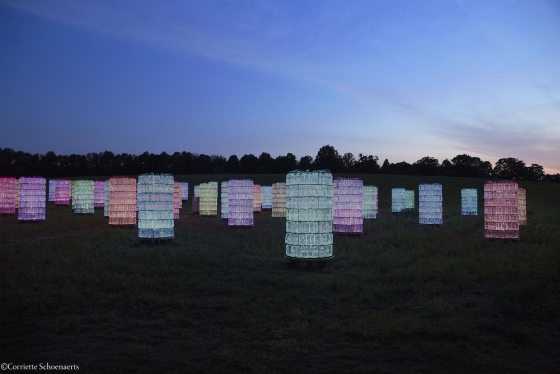
Arrive before dusk to capture the landscape and sunset, in addition to the Light Installations. Photo by Corriette Schoenaerts.
2. Turn off Your Flash As a courtesy to all guests, flash photography after dark is prohibited. Using your flash for evening shots will wash out the foreground and leave the background completely black. Refer to your manual for instructions on how to turn off the flash.
Using your flash will result in dark, lackluster images.

This picture of Arrow Spring was taken without a flash, using a tripod.
3. Hold Still! Capturing sharp images in low-light settings can be difficult. To get a sharp image, you will need to hold your camera as still as possible. Brace your arms against a surface (or yourself) and hold steady. If possible, brace your camera against a surface. Use the self-timer setting on your camera to give yourself time to brace your camera after you’ve pressed the shutter button. Or, for the best quality images, use a tripod or monopod.
4. Use a Tripod or Monopod Tripods, and to a lesser extent monopods, will allow you to capture the longer exposures needed for most nighttime photography. At twilight on a clear evening, a long, balanced exposure can capture a blue sky as well as the lights and the Gardens. Some lights may move on a windy evening and this will be reflected in long exposures. Be sure to obtain a permit for your tripod at the Information Desk in the Visitor Center. Tripods and monopods are allowed outside anytime with a permit and before noon inside the Conservatory.
5. Know Longwood’s Photo Policies Longwood Gardens encourages our guests to take casual photographs and videos of their visit for their own personal use. However, personal photographs and videos may not be used for commercial purposes. Additional restrictions may apply for performances (announcements will be made prior to each show). Tripods and monopods are not allowed during Fireworks & Fountains shows. Photography sessions must not interfere with the enjoyment of Longwood's other guests. Longwood reserves the right to stop issuing tripod and monopod permits on high volume days. Visit our website to review our full photography policy.
6. Stay Focused If your images are very blurry, the problem may be focus. This happens more often on close-up shots. Try to take several shots and step back or zoom out to see if focus works in some of them. If possible, turn off your auto-focus and adjust your camera’s focus manually.
7. Use the Manual or Low-Light Modes to Optimize Your Shots Generally newer and more expensive cameras will have a range of settings that can result in the best photographs. Quality lenses can be set to let in more light (a full open aperture, like 2.8 f-stop). Many recent cameras also can be set to be more light sensitive (“ISO” set to high number, like 800). This will allow shorter exposure times and reduce the effect of camera movement. Setting your ISO to a high number will make focus all the more critical and will shorten the depth of field. You may need to set your focus manually on your desired focal point, rather than relying on auto-focus.
8. Capture Your Friends & Family Look for ambient light (from lampposts or pathway lights) to help you capture the smiling faces of your friends and family. Using the flash will wash out their faces and make the installations in the background appear completely black. Try taking people as silhouettes, or take them inside the Conservatory. In dim light and without flash, your subjects will need to hold still.
Use ambient light, from pathway lights or lampposts, to help capture your friends and family.
9. Experiment and Have Fun Try to intentionally move the camera while taking the photo to capture artistic light patterns. Look for interesting reflections in our lakes or puddles on a rainy evening.
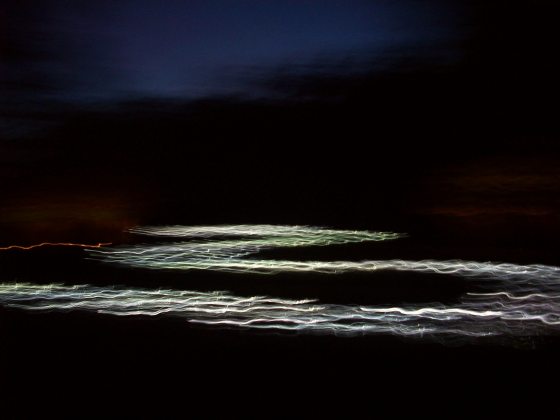
Experiment, have fun, and capture artistic light patterns!
10. Enjoy Your Surroundings Look up from your lens to stop, relax, and enjoy! Listen to the serenade of crickets, the soothing sounds of running water, and maybe even the hoot of an owl. Breathe in the fragrance of night-blooming flowers, and enjoy the beauty that surrounds you. We love to see the Gardens through our guests’ lenses—please visit our Facebook, Twitter, and Pinterest pages to share your pictures of the exhibition. Good luck, and we hope these tips will help you capture the installations just as you remember them—breathtaking!