This season we’re not only throwing it back with our A Longwood Christmas celebration of all things retro … we’re also showcasing just how far handmade items can go when putting together a holiday display. We have a long tradition of handcrafting amazing works for our displays and this year is no exception. From living wreaths, to floral chandeliers, to creative ornaments, we’ve had so much fun rolling up our sleeves and hand-creating for the season. Here, we share a look at two of the handcrafted concepts on display this season—and how you can create one of them at home.
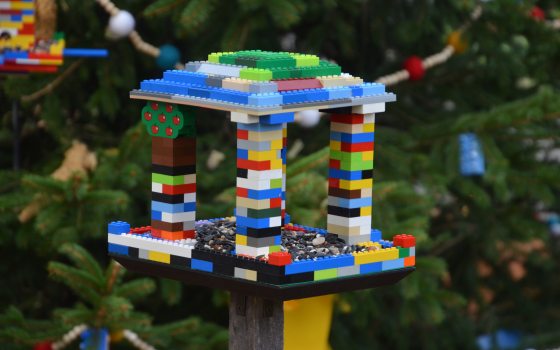
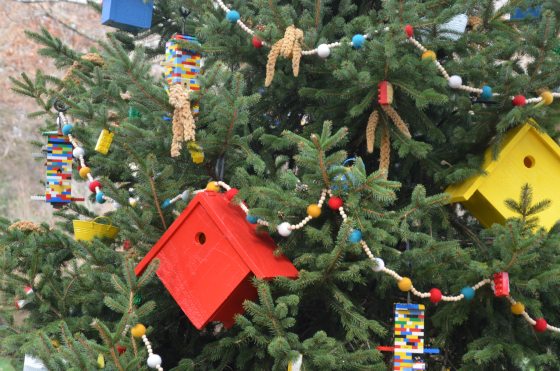
One of the many beloved aspects of our A Longwood Christmas display is our Wildlife Tree—and for very good reason. Led by Senior Land Stewardship Technician Pandora Young, staff and volunteers annually create this outdoor feature that calls attention to—and nourishes—the birds and small mammals that live in the Gardens. This year, the 14-foot Wildlife Tree has been outfitted in a variety of fantastic handmade items: 17 handmade brick-toy birdfeeders as well as tin seed holders in bold primary colors, birdhouses painted in complementary hues, a wood and brick-toy tree topper, grain bundles, larger brick toys filled with high-energy suet, and a whimsical garland of colorful felt balls and wooden beads that, while isn’t edible, serves as a feast for the eyes. What is edible, though, will nourish such frequent visitors to the Wildlife Tree as chickadees, tufted titmouse, junco, goldfinches, and woodpeckers.
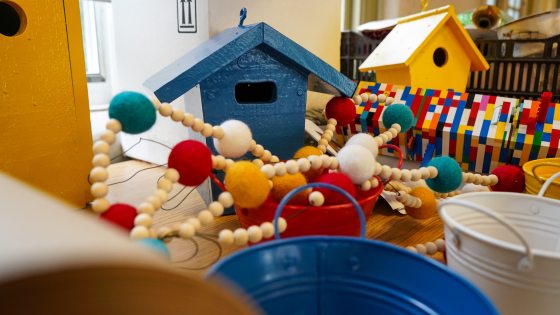
From brick-toy birdhouses to painted birdhouses, felt garland and birdfeeder tins, this year’s Wildlife Tree is outfitted in bold colors and lots of imagination. Photo by Carol Gross.
Keeping true to our celebration of all things retro, the tree’s birdfeeders and topper not only give a nod to the iconic brick-toy company that was established in 1932 and started making plastic blocks in 1947, but also give nourishment and respite for our furry and feathered friends throughout the season. A team made up of Young, Professional Horticulture Student Carlos Rodriguez, and since starting the birdfeeders this last June, 10 volunteers have spent 150 hours creating these 17 brick-toy birdfeeders.

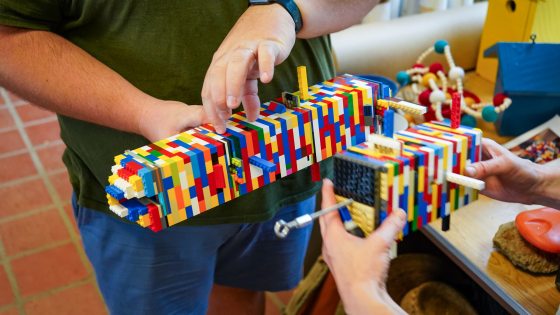
Volunteer Nancy Papay works on building of this year’s Wildlife Tree birdfeeders. Photo by Carol Gross.
Using bin upon bin of donated brick toys, the team first sorted the bricks by size and shape, and then built each birdfeeder freehand, making sure to vary the colors of bricks used for each birdfeeder while achieving its desired form. Every birdfeeder is unique and an original design. All the hanging feeders have tops that easily open and close so seed can be refilled as needed.
A threaded rod hanger runs down the center of the hanging feeders, with nuts and washers sandwiching the base plates, so the weight of the entire feeder rests securely on the bottom of the structure. Photo by Carol Gross.

Senior Land Stewardship Technician Pandora Young leads the Wildlife Tree creation each year. Photo by Carol Gross.
After the birdfeeders were put together, the team ensured pieces were stable and hardware was properly installed. The team created 14 tube-style and three platform-style birdfeeders to accommodate many species of birds, as some prefer feeding from trays and platforms as opposed to tubes.

Volunteer Ben Hamilton with one of his Wildlife Tree creations. Photo by Carol Gross.
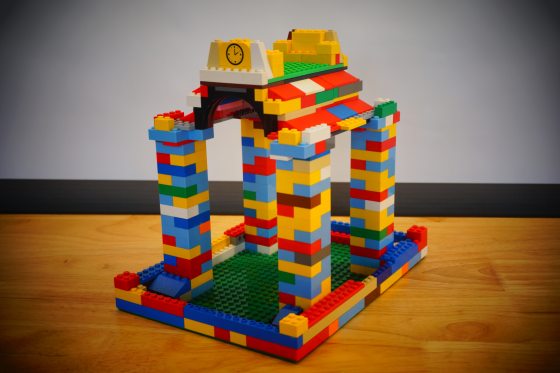
One of our finished platform-style birdfeeders, with fun touches and plenty of charm. Photo by Carlos Rodriguez.
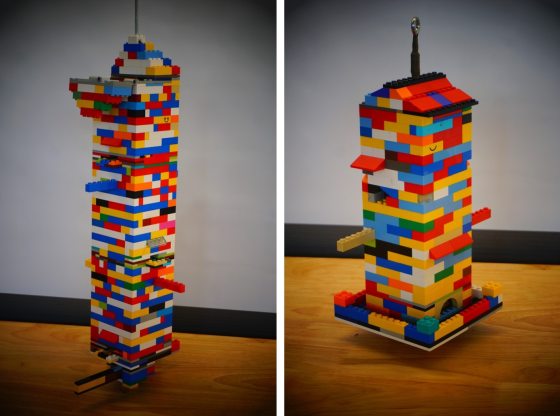
Two of our finished tube-style birdfeeders; can you spot the smiles? Photos by Carlos Rodriguez.
The edible portions of the Wildlife Tree are replenished frequently throughout A Longwood Christmas to ensure the tree continues to nourish its furry and feathered guests during the season.
A close view of our Wildlife Tree, complete with birdfeeders, birdhouses, garland, tins, and edible elements. Photo by Amy Simon Berg.
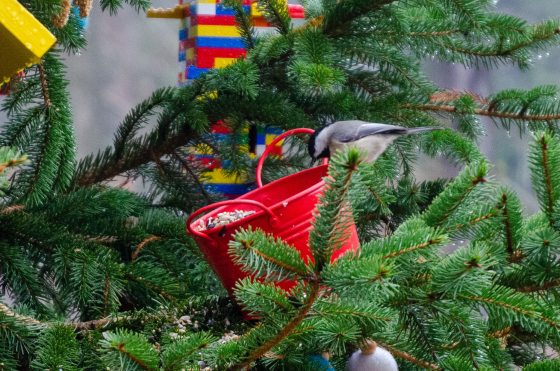
A chickadee visits the Wildlife Tree. Photo by Amy Simon Berg.

Our Wildlife Tree shines at night. Photo by Hank Davis.
Another handmade, unique, and festive item on display this year can be found in The Garden Shop—and recreated at home. On display throughout A Longwood Christmas, our paper honeycomb ornaments have been handmade by Visual Experience Manager Kaitlin Dodds—the creative force behind all other handmade decoratives in the Shop —and Garden Shop Retail Associate Nicole Ferrante. Ferrante lends a skilled and artistic hand to many creative projects The Garden Shop pursues, from handmade displays to and Planted By Longwood pieces available for purchase.
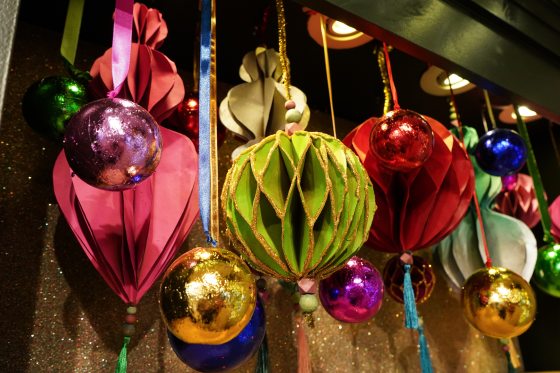
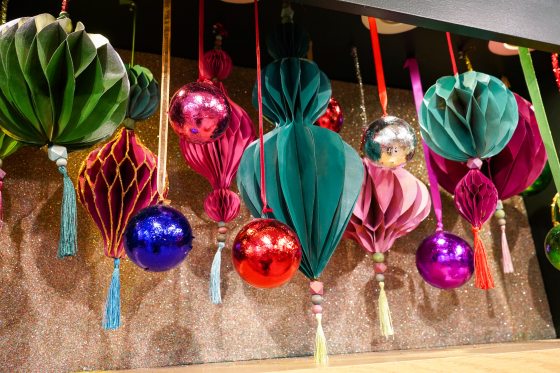
To add to the wonderfully festive atmosphere of The Garden Shop, Dodds and Ferrante adorned shelves with these dazzling handmade creations. Photo by Carol Gross.
Utilizing simple materials that you can find in your local craft store, this is the perfect DIY project to adorn your windows, mantels, and more—you can even create miniature versions to hang on your Christmas tree! It’s also a great activity for the entire family.
Materials Needed
- For the Stencil: Construction Paper
- Pencil
- Brown craft paper (or any lighter-weight colored paper of your choosing)
- Scissors
- Glue
- Ribbon or twine
- Optional: long thin wire
- Optional: spray paints, beads, tassels
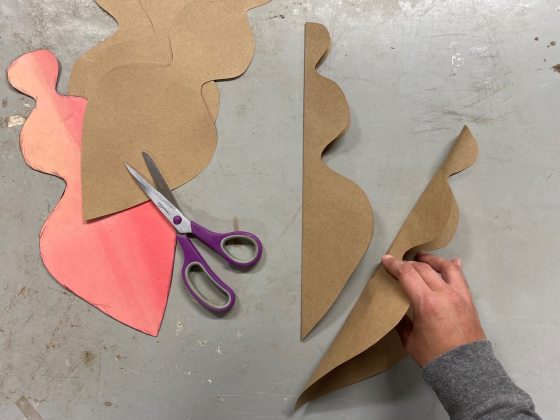
Step 1. There is so much variation to this honeycomb ornament project, as you can make them any rounded shape you want. Create your stencil by either sketching out your own or searching for honeycomb ornament templates online and printing them out to use. If you would like to create your own unique template, fold a piece of construction paper in half, then draw half of your ornament design with the middle of the ornament shape facing the folded edge. Cut out your shape with the paper still folded. When you unfold, you will have the complete, symmetrical design.
Step 2. Trace your ornament stencil on your brown craft paper or colored paper. The number of pieces each ornament requires will vary based on how small or large you make your stencil. The average number of pieces you will need is 15, as this will make your ornament look full and well-rounded. However, you can use more pieces if you would like your ornament to look more complex—or less if you’d like a minimal look.
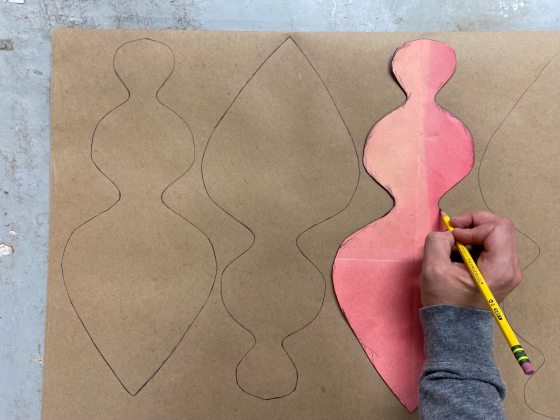
You can opt for a more complex or minimal look by playing with the ornament shape and size. Photo by Nicole Ferrante.
Step 3. Cut out the ornament pieces that you’ve traced.
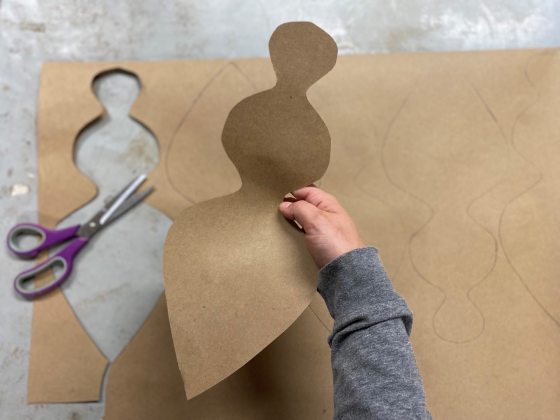
Try to cut each one as precisely along the lines as possible. Photo by Nicole Ferrante.
Step 4. Fold each piece in half, vertically, as shown in the image below.
Ensure that the edges of your shape line up evenly when folding. Photo by Nicole Ferrante.
Step 5. On the inside of each folded piece, apply thin lines of glue as indicated in the picture below. Try to keep your lines of glue as thin as possible and to stop the glue line just before you reach the edge of your shape; this will help keep the glue from seeping out of the edges. Then, close and press each folded piece to adhere. Repeat with all of your pieces. Allow at least 5 minutes for the glue to set before you begin the next step.
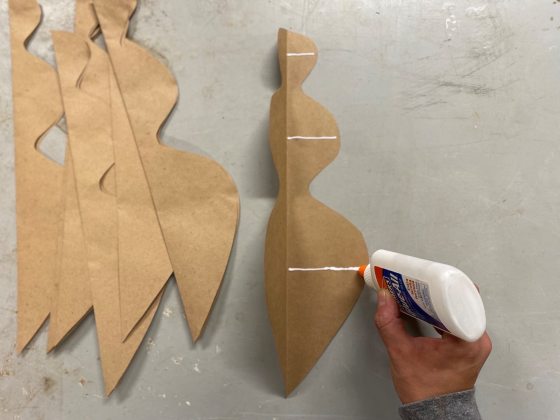
For best results, allow 30 minutes to an hour for the glue to completely dry before continuing. Photo by Nicole Ferrante.
Step 6. Once your folded pieces are dried, start with one piece and apply thin lines and small dots of glue as indicated in the image below. Place a second dried folded piece on top and press to adhere. Repeat Step 6 until you have all of your folded pieces from Step 5 glued and stacked together in one neat and complete pile. Allow at least 5 minutes for the glue to set before you begin the next step. For best results, allow 30 minutes to an hour for the glue to completely dry before continuing.
The ornaments are about to take shape! Photo by Nicole Ferrante.
Step 7. Once all of your pieces are glued together and dried, gently fan out the stack of glued pieces, stretching like an accordion to bring one side towards the other.
Take your time with this step to achieve a clean look. Photo by Nicole Ferrante.
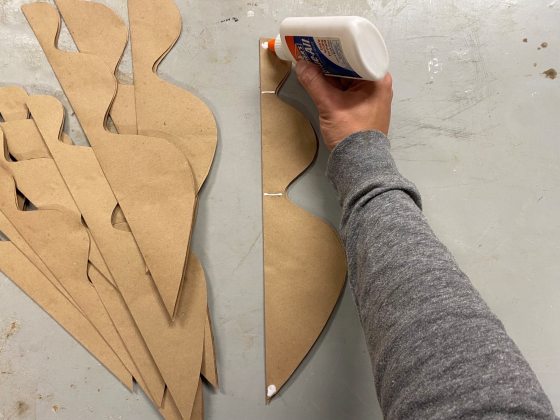
Step 8. Apply glue to one side of your accordion piece as indicated in the image below. Press the sides together and apply pressure to the glued areas for a few minutes to ensure that the ornament remains open and glued together securely.
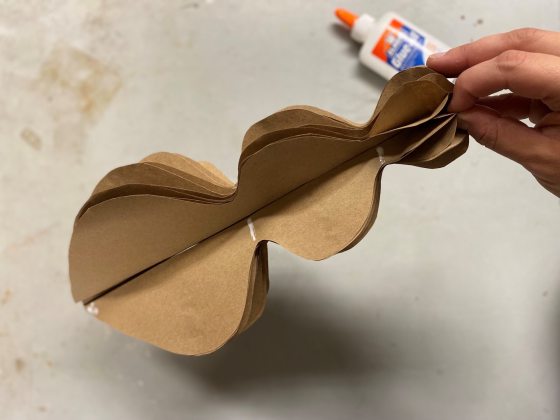
To allow time to dry, use paper clips to hold glued ends together if needed. Photo by Nicole Ferrante.

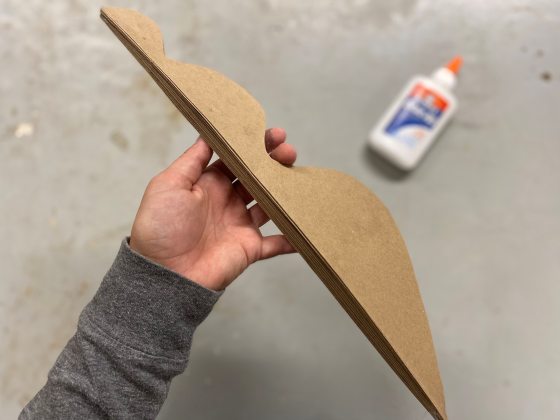
The glued, folded, and fanned ornament is now ready for some fun color and details. Photo by Nicole Ferrante.
Step 9. Your honeycomb ornament is now ready for embellishment! If you used brown craft paper, select a fun spray paint to evenly coat the ornament with color. If you use spray paint, apply in a well-ventilated area, and use gloves and a face mask. If you used colored paper to create your pieces, you’re already a step ahead. Don’t be afraid to experiment with glitter and ombre.
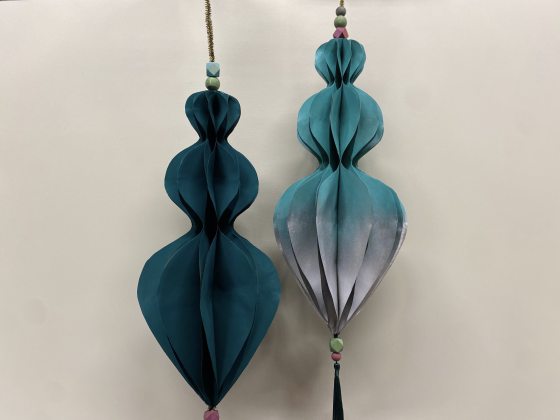
Experiment and have fun with a variety of shapes and colors! Photo by Nicole Ferrante.
Step 10. Once embellished, thread ribbon of your choosing—with a thickness of a one-quarter to one-half inch—through the middle of the ornament (tip: use the long thin wire to help fish your ribbon through from the other side if you’re having trouble). If desired, adorn the ribbon with colored beads and funky tassels.
Brighten up your space the same way we make our Shop shine! Photo by Carol Gross.
We’re so delighted to share our creativity with you this holiday season … and we hope you’re inspired to create your own handmade holiday features at home.